Cách thiết lập Google Analytics
Google Analytics được sử dụng để xem và hiểu lưu lượng truy cập web.
Nó là miễn phí và dễ sử dụng.
Bạn có thể tùy chỉnh nó cho nhiều trường hợp sử dụng.
Nó hoạt động ra khỏi hộp.
Nó là nhanh chóng để thiết lập. Nhận thông tin chi tiết của bạn ngay hôm nay!
Tạo trang web miễn phí của tôi ❯Bỏ qua phần đọc về Google Analytics. Đưa tôi trực tiếp đến bước đầu tiên. Đi đến bước đầu tiên
Google Analytics là gì
Google Analytics là một giải pháp phân tích trang web.
Nó được phát triển và hỗ trợ bởi Google.
Phiên bản mới nhất được gọi là Google Analytics 4.
Nó có thể được sử dụng để xem dữ liệu như đối tượng, lượt xem trang, phiên và nhân khẩu học và sự kiện.
Tại sao bật Google Analytics
Hiểu lưu lượng truy cập web của bạn để đưa ra quyết định tốt hơn.
Hiểu và cải thiện phễu bán hàng.
Học hỏi từ thử nghiệm (ví dụ: kiểm tra a / b).
Google có một giải pháp khác được gọi là Google Optimize. Giải pháp này được thực hiện để thử nghiệm.
Google Analytics dành cho ai
Google Analytics hữu ích cho bất kỳ ai có trang web.
Nó cung cấp cho bạn thông tin về những người sử dụng trang web của bạn và cách họ tương tác với nó.
Ngoài ra, giao diện dễ hiểu.
Bạn không cần có nền tảng phân tích để sử dụng và điều hướng dịch vụ.
Cách thiết lập Google Analytics từng bước
Google Analytics có thể được thiết lập theo hai cách Thẻ trang web toàn cầu (gtag.js) hoặc Trình quản lý thẻ của Google .
Cách dễ nhất là sử dụng Thẻ trang web toàn cầu.
Hướng dẫn này sẽ sử dụng cách tiếp cận Thẻ trang web toàn cầu.
Chuẩn bị
Quyết định trình soạn thảo mã nào sẽ sử dụng và thiết lập môi trường của bạn.
W3Schools đã tạo ra một trình soạn thảo mã dễ sử dụng có tên là W3Schools Spaces . Đăng ký và bắt đầu trong một vài cú nhấp chuột.
Bắt đầu miễn phí ❯Tạo tệp index.html của bạn để bạn sẵn sàng nhập mã.
Tất cả các thiết lập. Đi nào!
Thiết lập Google Analytics: Thẻ trang web toàn cầu
Bước 1: Tạo tài khoản Google Analytics
Chuyển đến Analytics: Tạo tài khoản hoặc đăng nhập vào Analytics
Liên kết trong đoạn trên sẽ đưa bạn đến trang đích của Google Analytics.
Nhấp vào nút "Bắt đầu miễn phí".

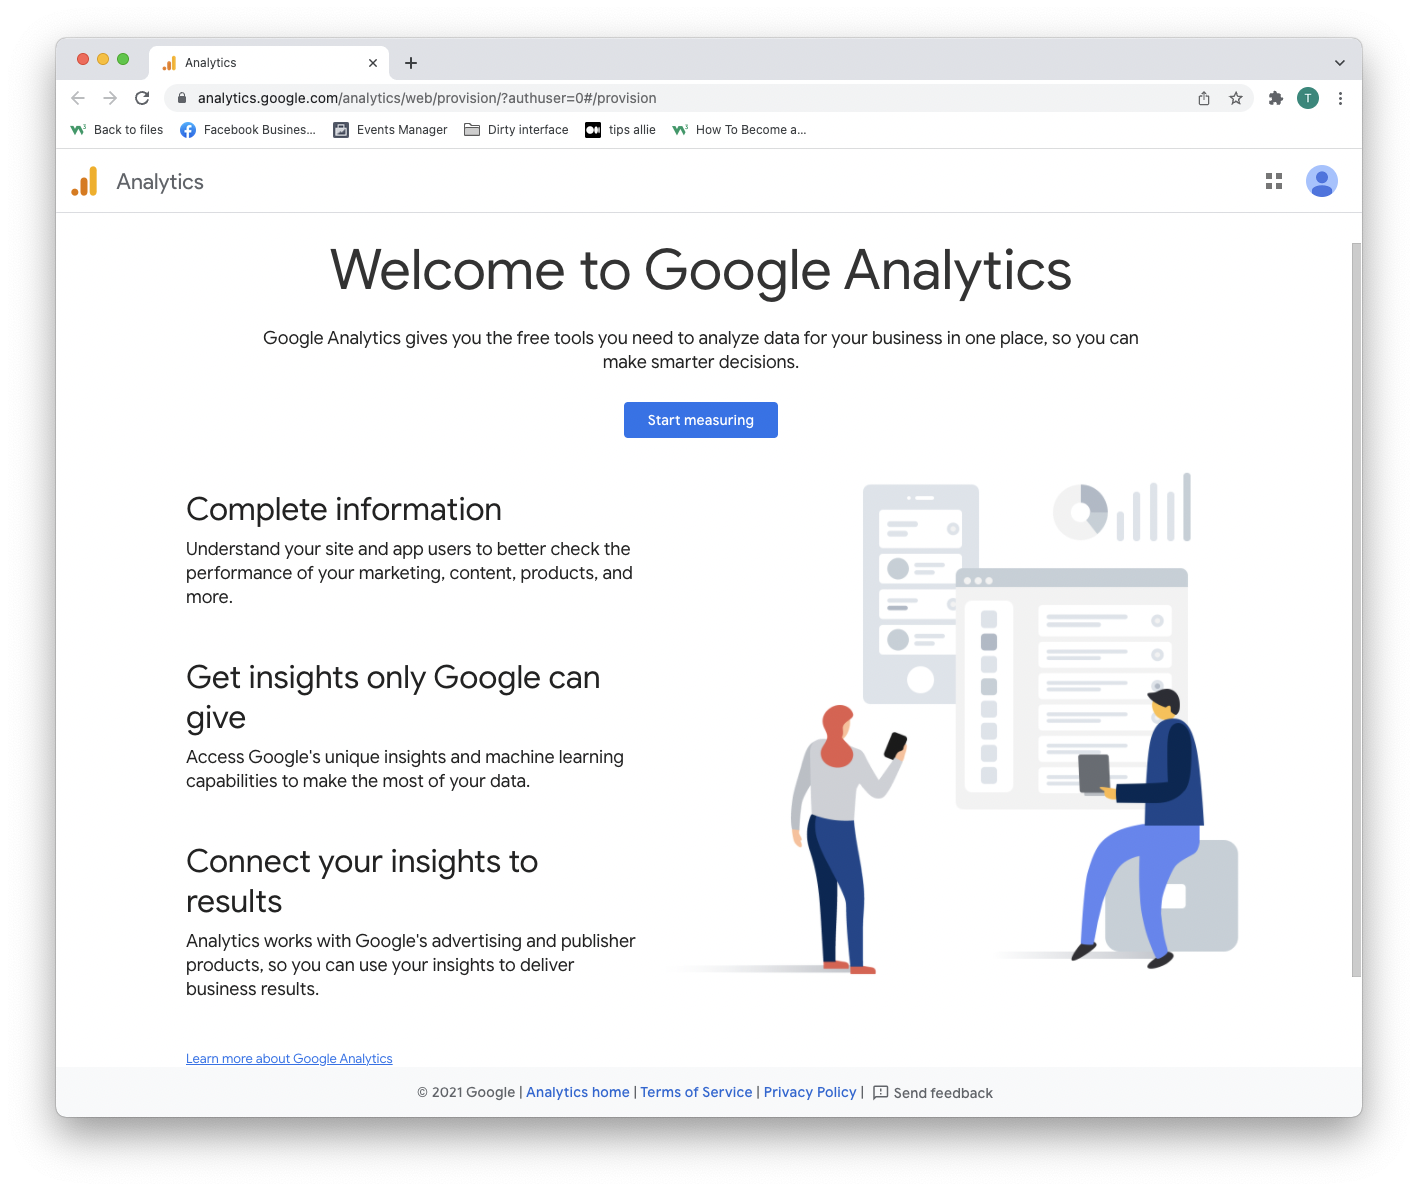
Bước 2: Vào trang chào mừng
Sau khi tạo tài khoản hoặc đăng nhập, bạn được hoan nghênh với giải pháp.
Nhấn nút "Bắt đầu đo" để tiếp tục.
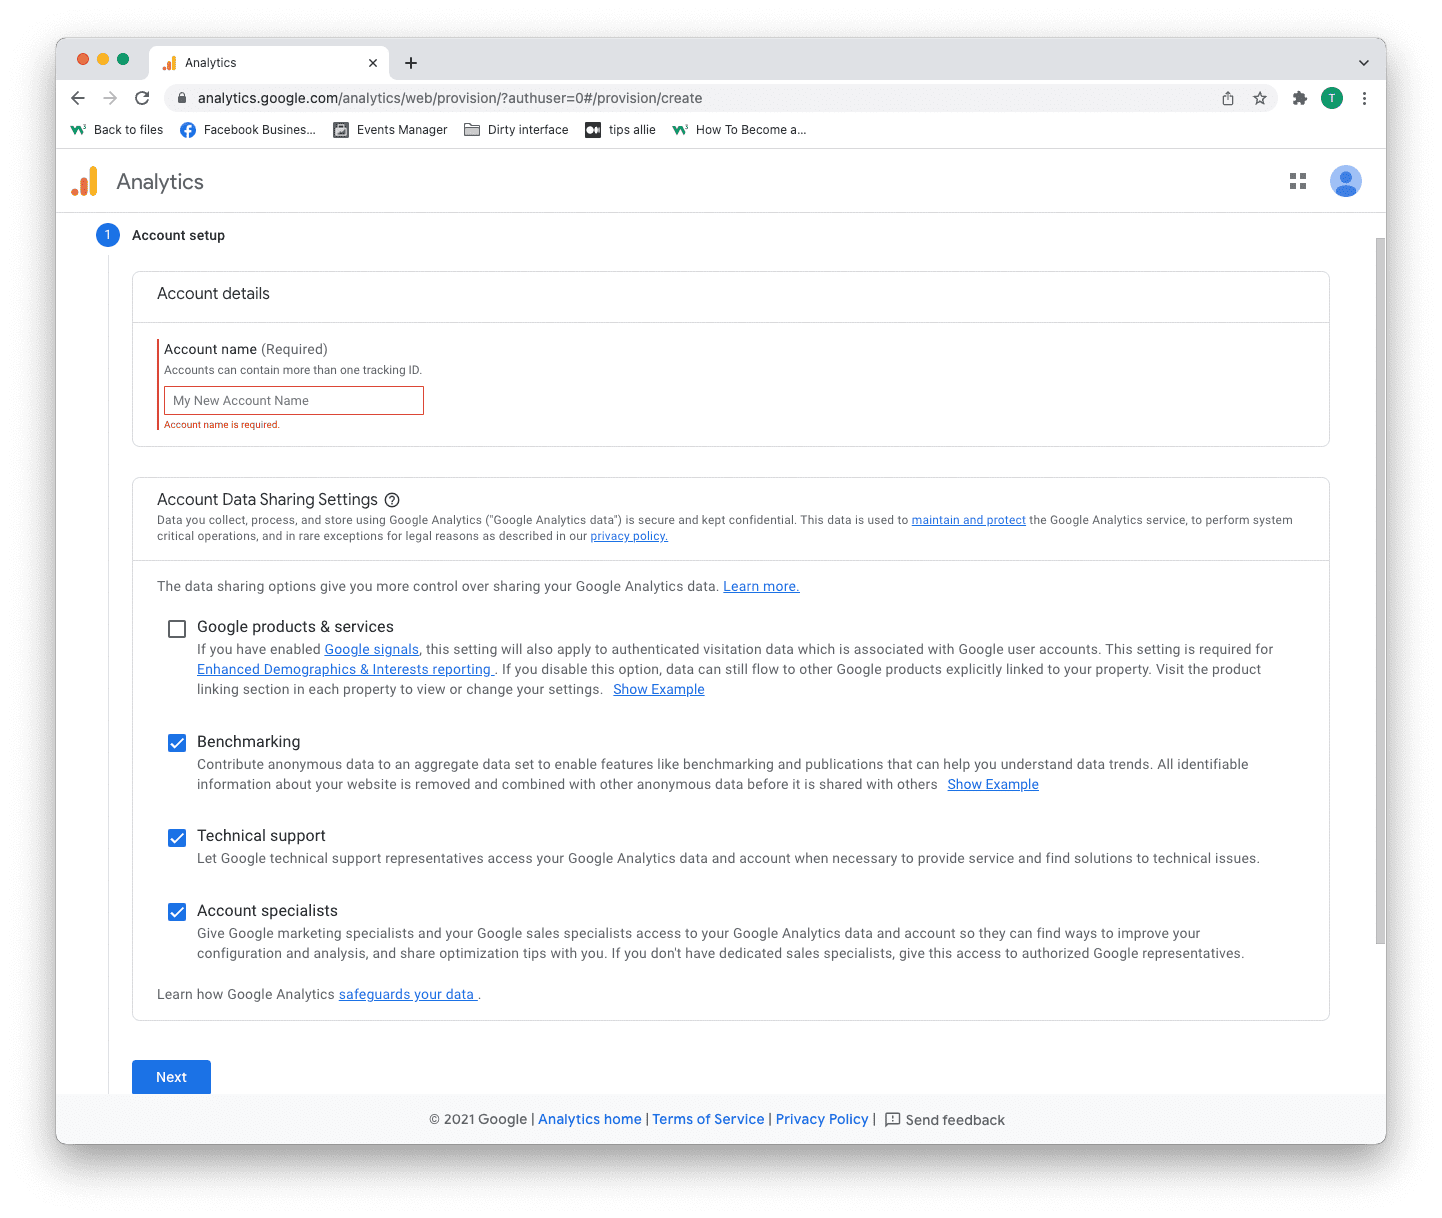
Bước 3: Thiết lập tài khoản
Bạn có hai quyết định để thực hiện ở đây.
- Nhập tên tài khoản của bạn.
- Quyết định dữ liệu nào bạn muốn chia sẻ.
- Nhấp vào nút "Tiếp theo".
Một tài khoản có thể có nhiều ID theo dõi. Bạn có thể theo dõi nhiều trang web bằng một tài khoản.
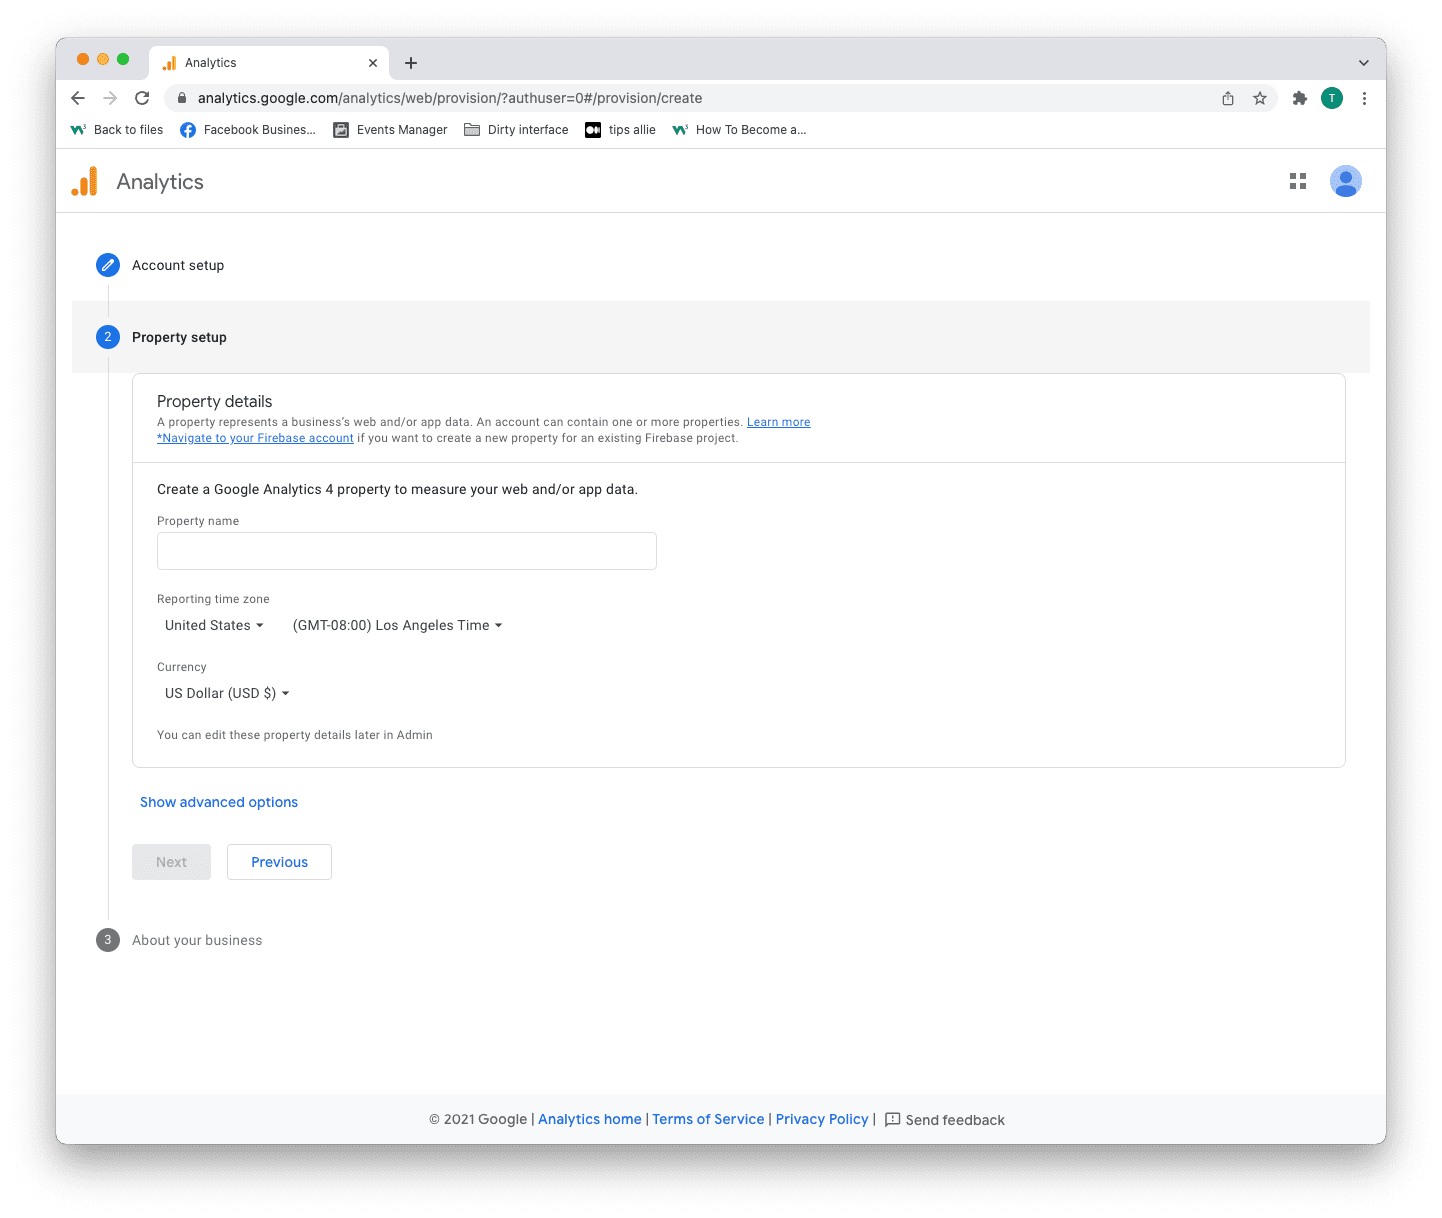
Bước 4: Thiết lập thuộc tính
Thuộc tính là dịch vụ mà bạn đo lường, chẳng hạn như trang web, ứng dụng, cây liên kết, v.v.
- Nhập tên tài sản.
- Nhập múi giờ của bạn.
- Nhập đơn vị tiền tệ mà bạn sử dụng.
- Nhấp vào nút "Tiếp theo".
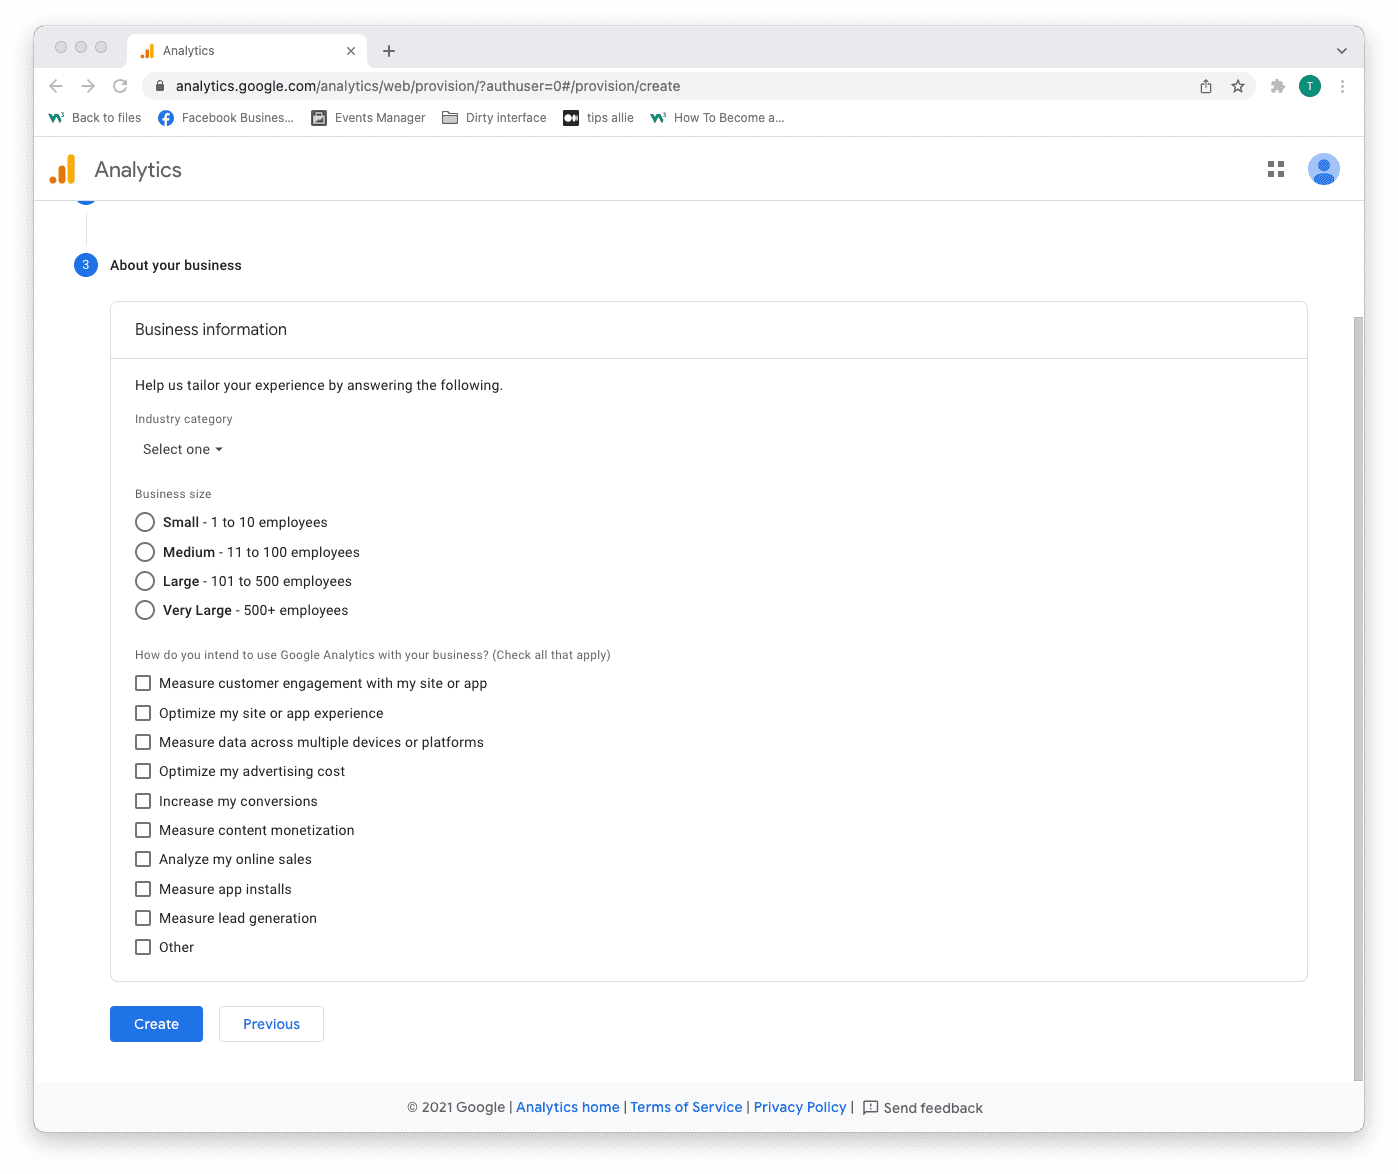
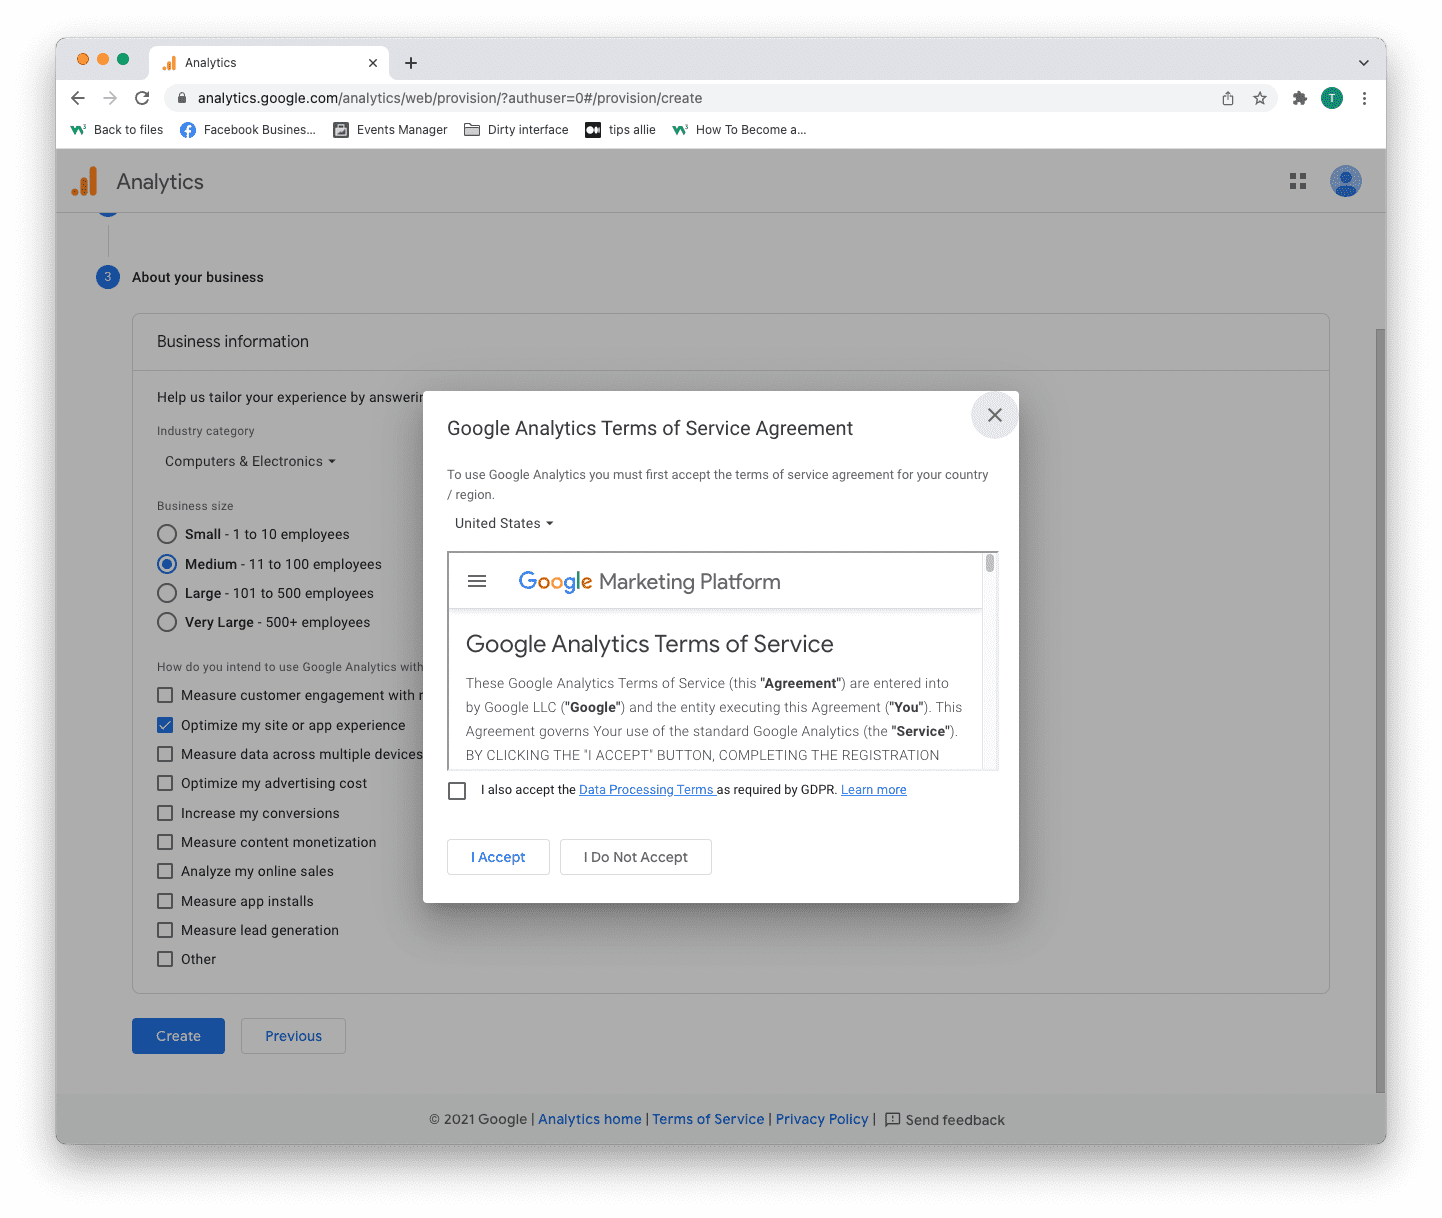
Bước 5: Thêm thông tin doanh nghiệp
Analytics sử dụng thông tin để điều chỉnh trải nghiệm của bạn.
- Chọn danh mục ngành của bạn.
- Lựa chọn quy mô doanh nghiệp.
- Tick the boxes for how you are planning to use Analytics.
- Click the "Create" button to proceed.
Step 6: Terms of Service Agreement
Read and understand the terms of service.
Tick the GDPR box and click the "I accept" button if you agree.
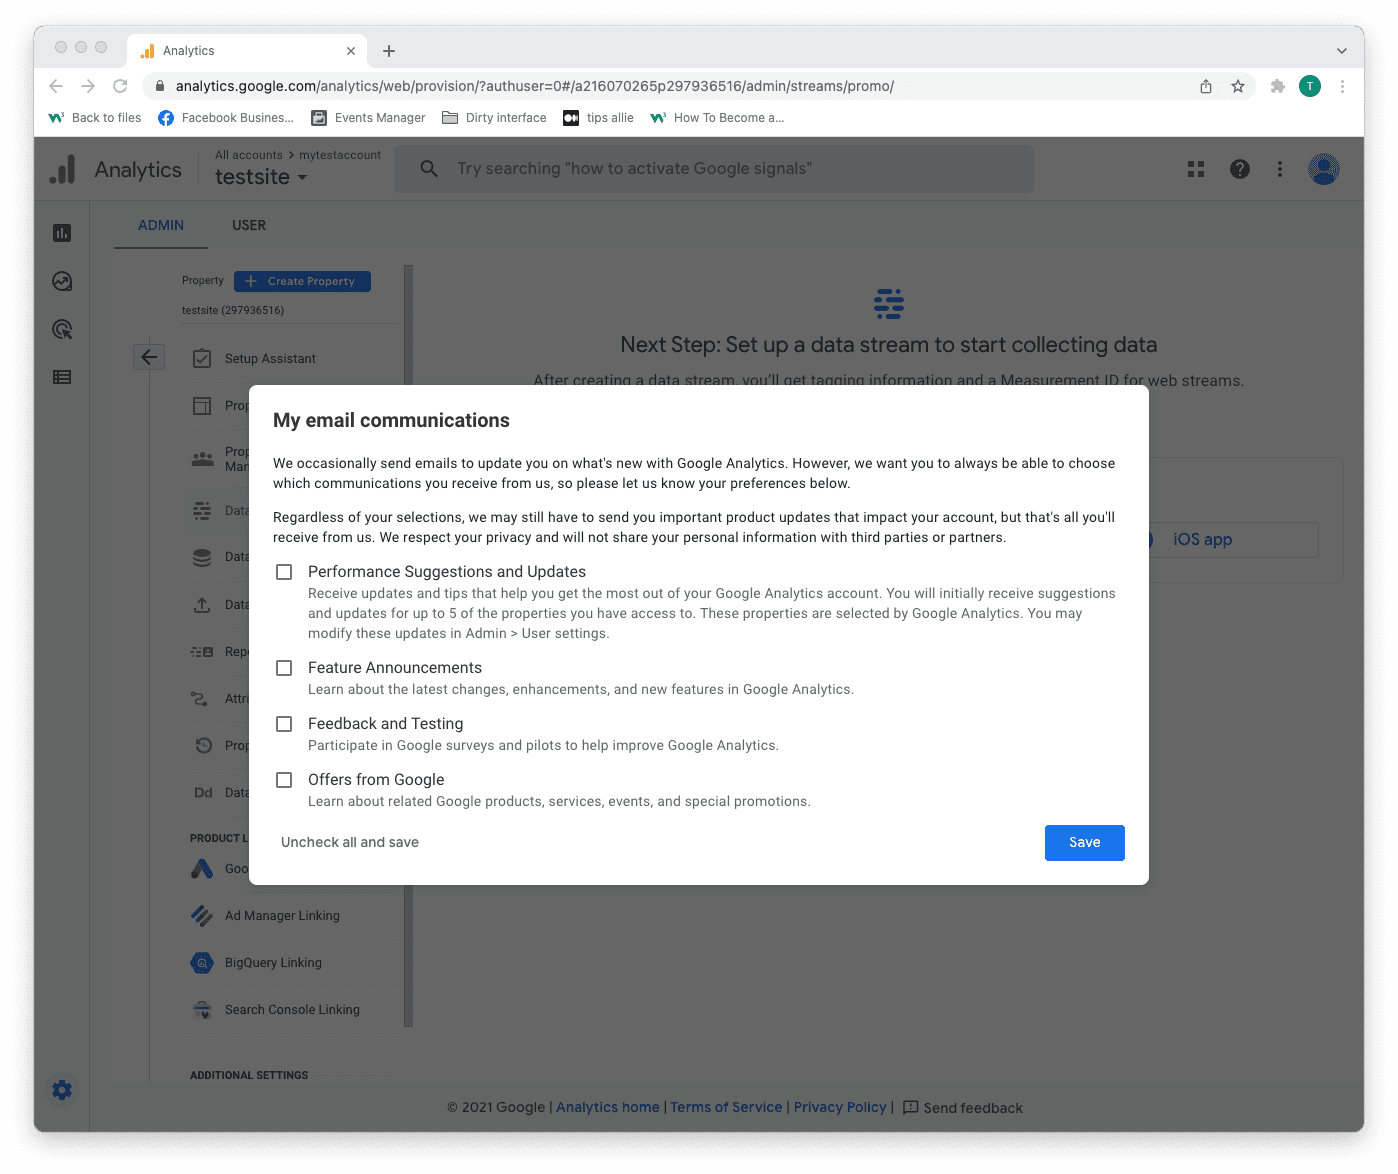
Step 7: Email subscriptions
- Tick or uncheck all boxes.
- Click the "Save" button to continue.
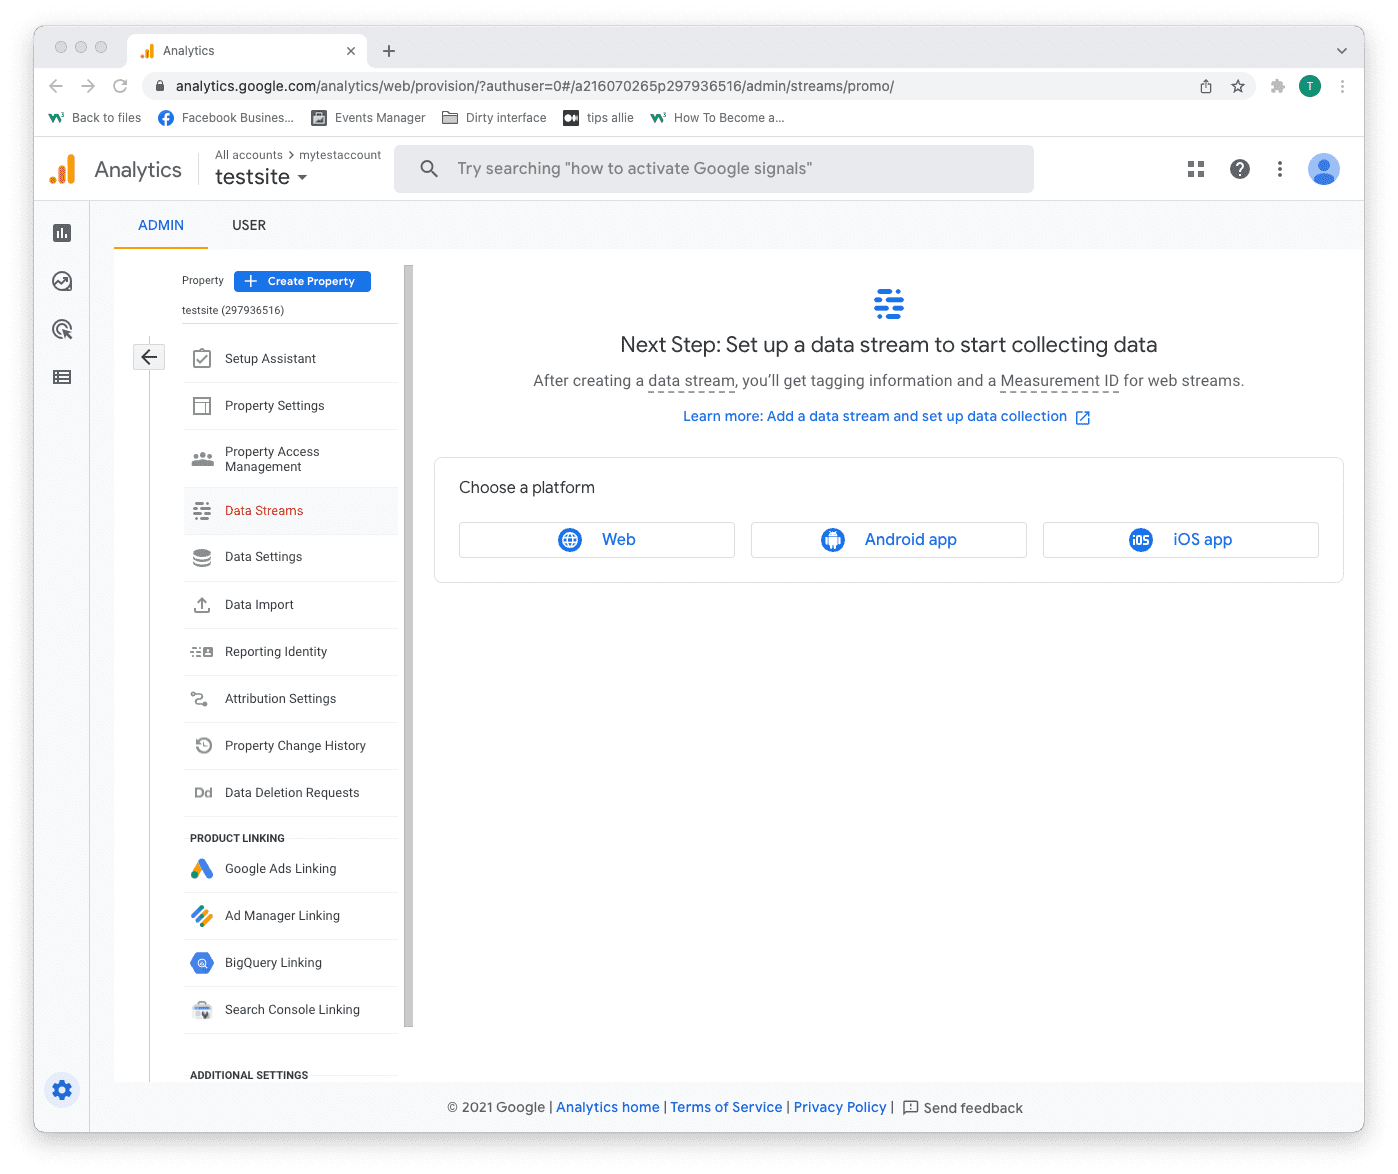
Step 8: Select platform
Chose the platform where you are collecting data.
Then, click the relevant platform to continue.
We are continuing with "Web" as the example in this tutorial.
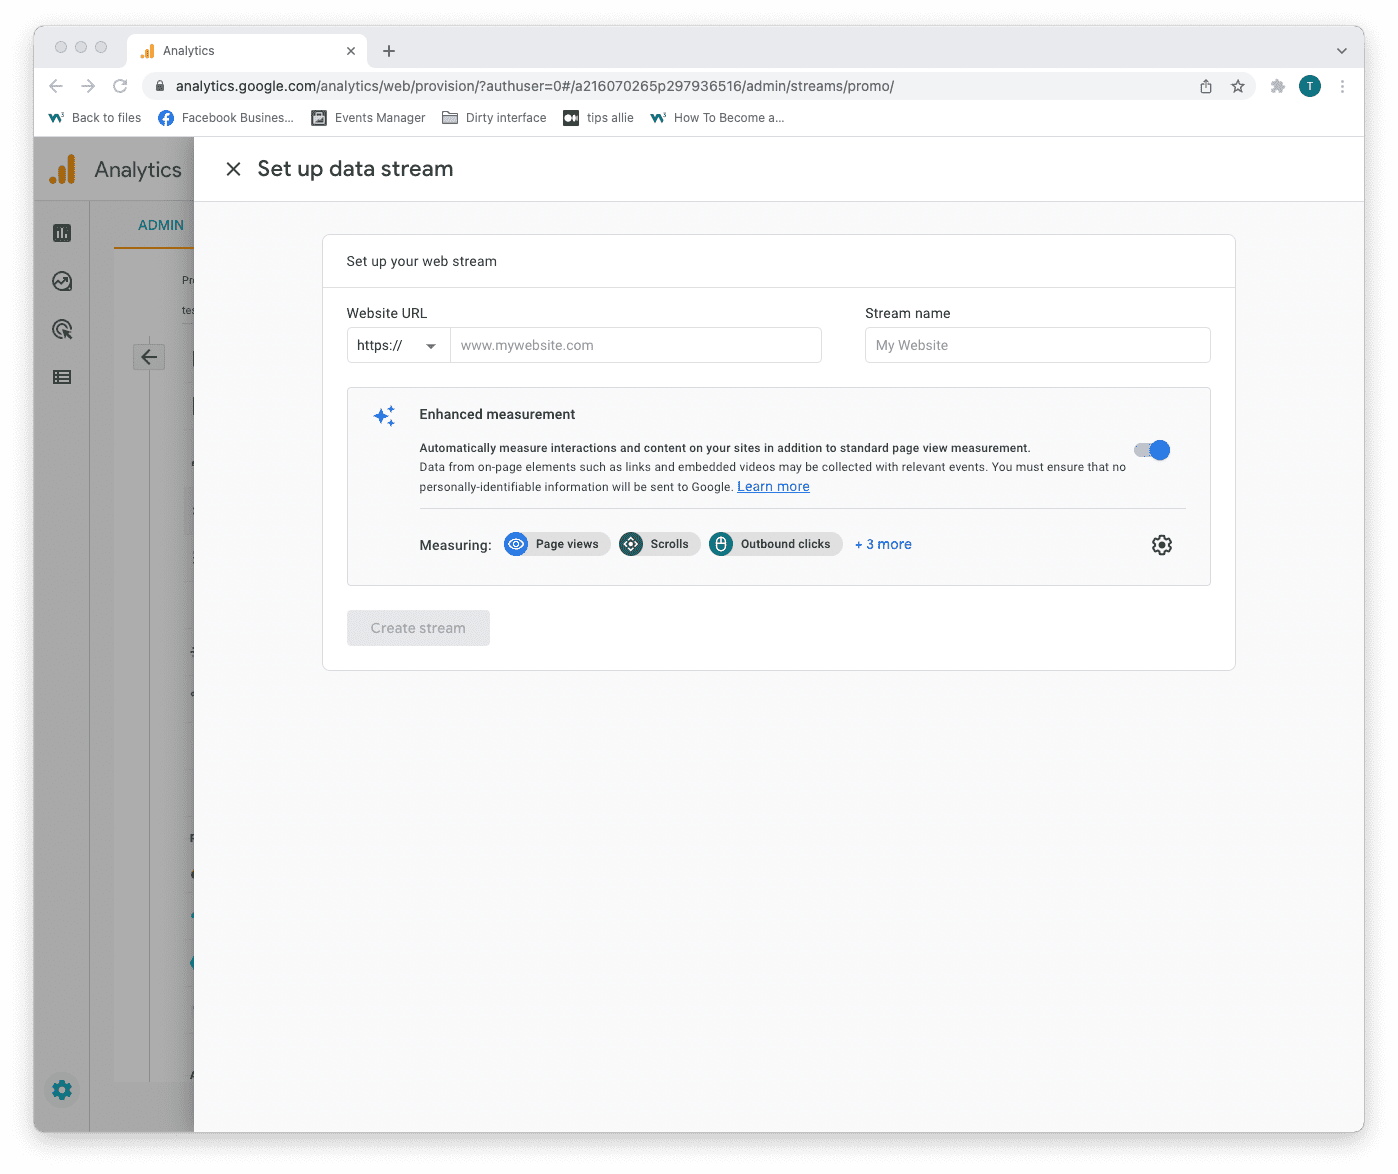
Step 9: Data stream setup
Enter data stream details.
- The URL to your site.
- The name that you want to give the stream.
- Decide if you are to enable enhanced measurement or not.
- Click on the "Create stream" button to continue.
The enhanced measurement can give the data more context. Improving your understanding of the traffic.
Step 10: Web stream overview
Here you can see a detailed overview of the web stream.
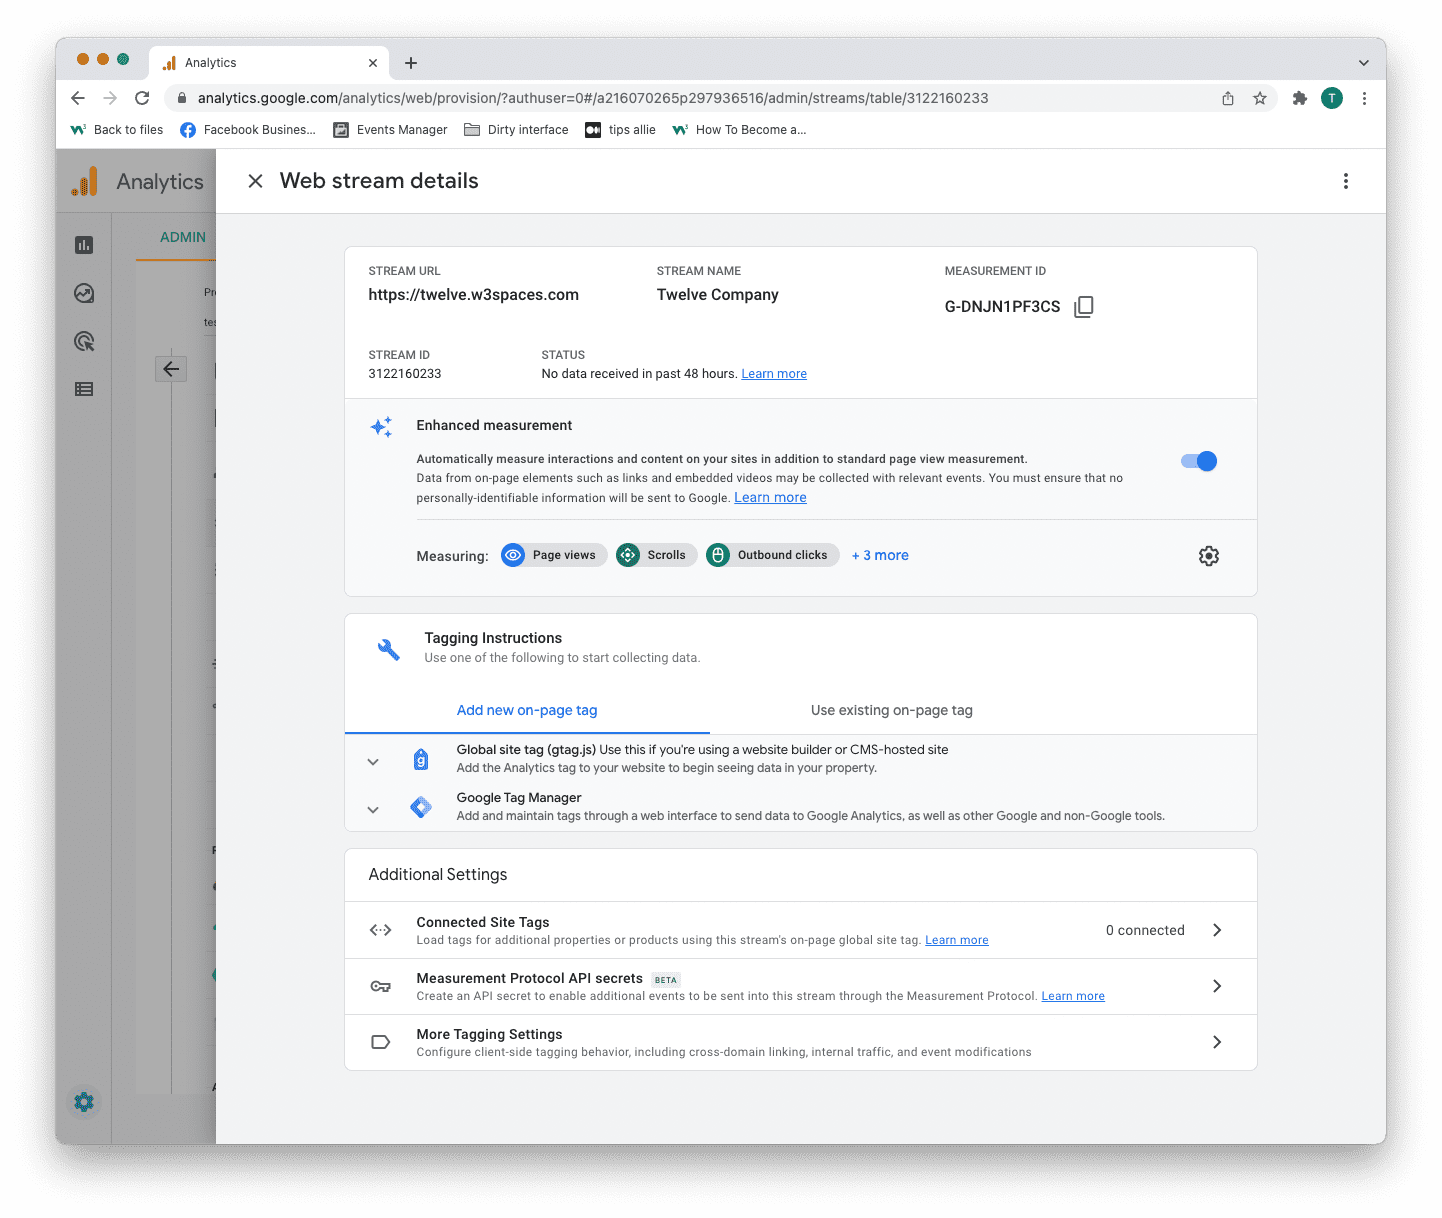
Here are the key takeaways from the overview.
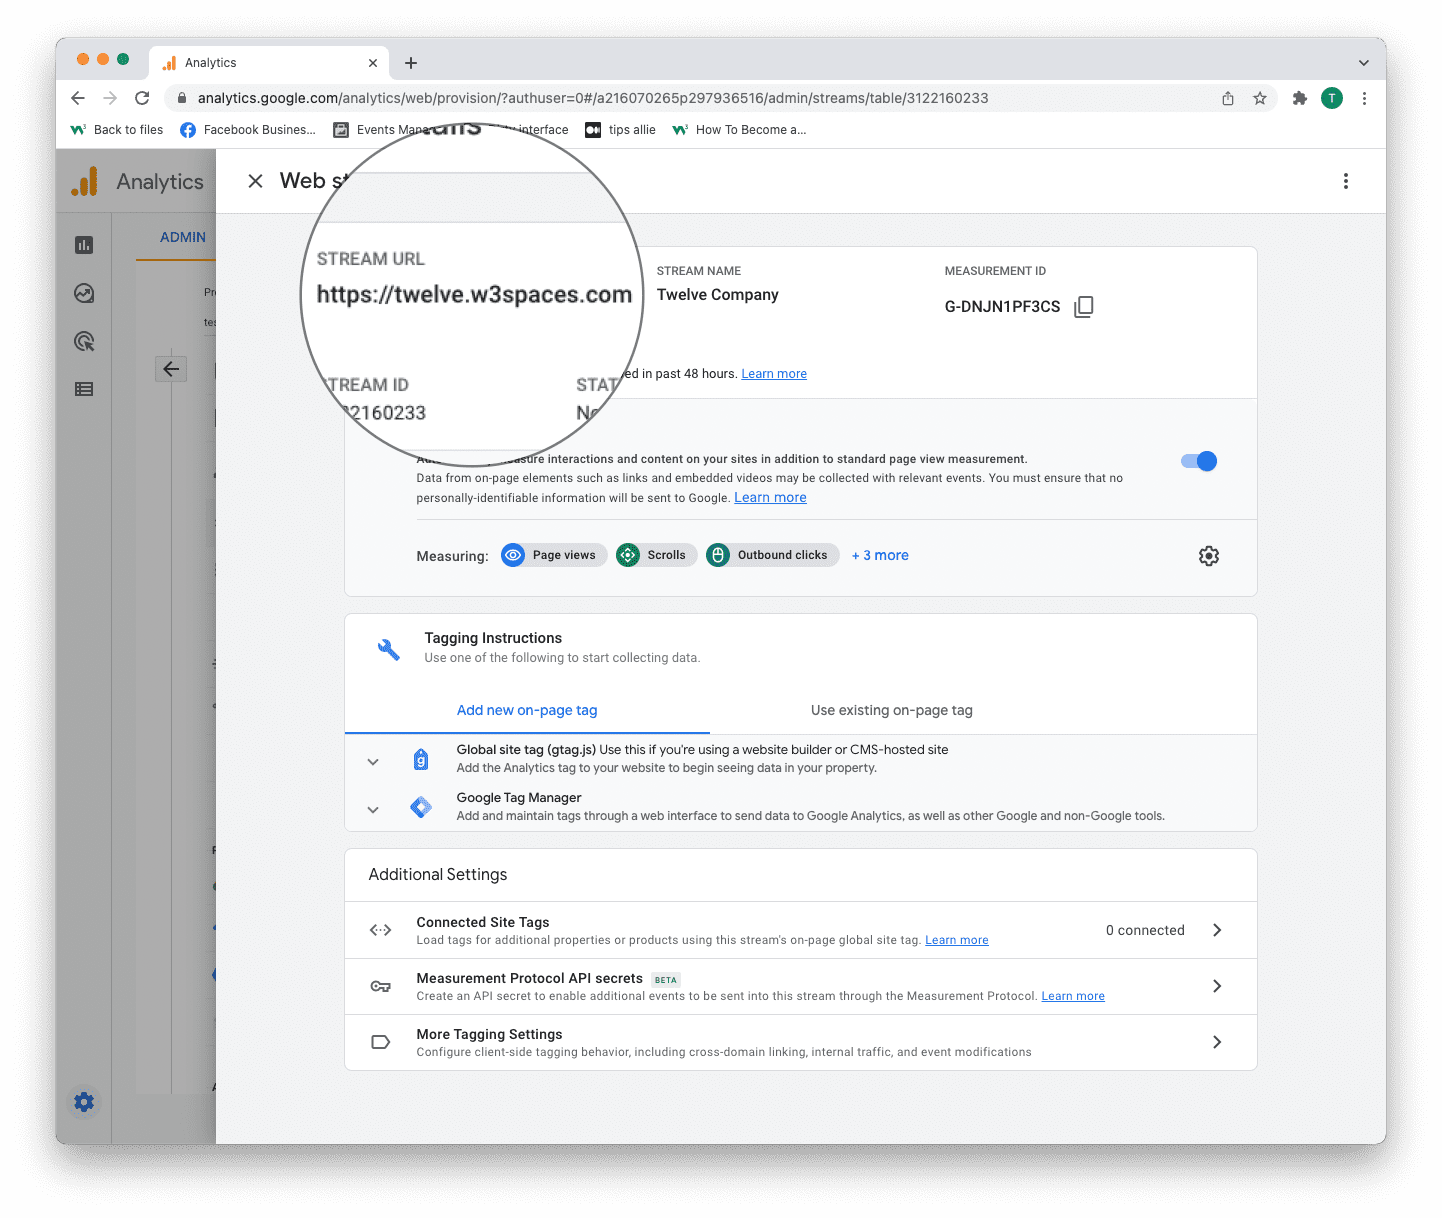
1. Stream URL.
The Stream URL is the link to the connected site.
2. Measurement ID
The Measurement ID is the identifier for your data stream.
It has a format of G-XXXXXXX.
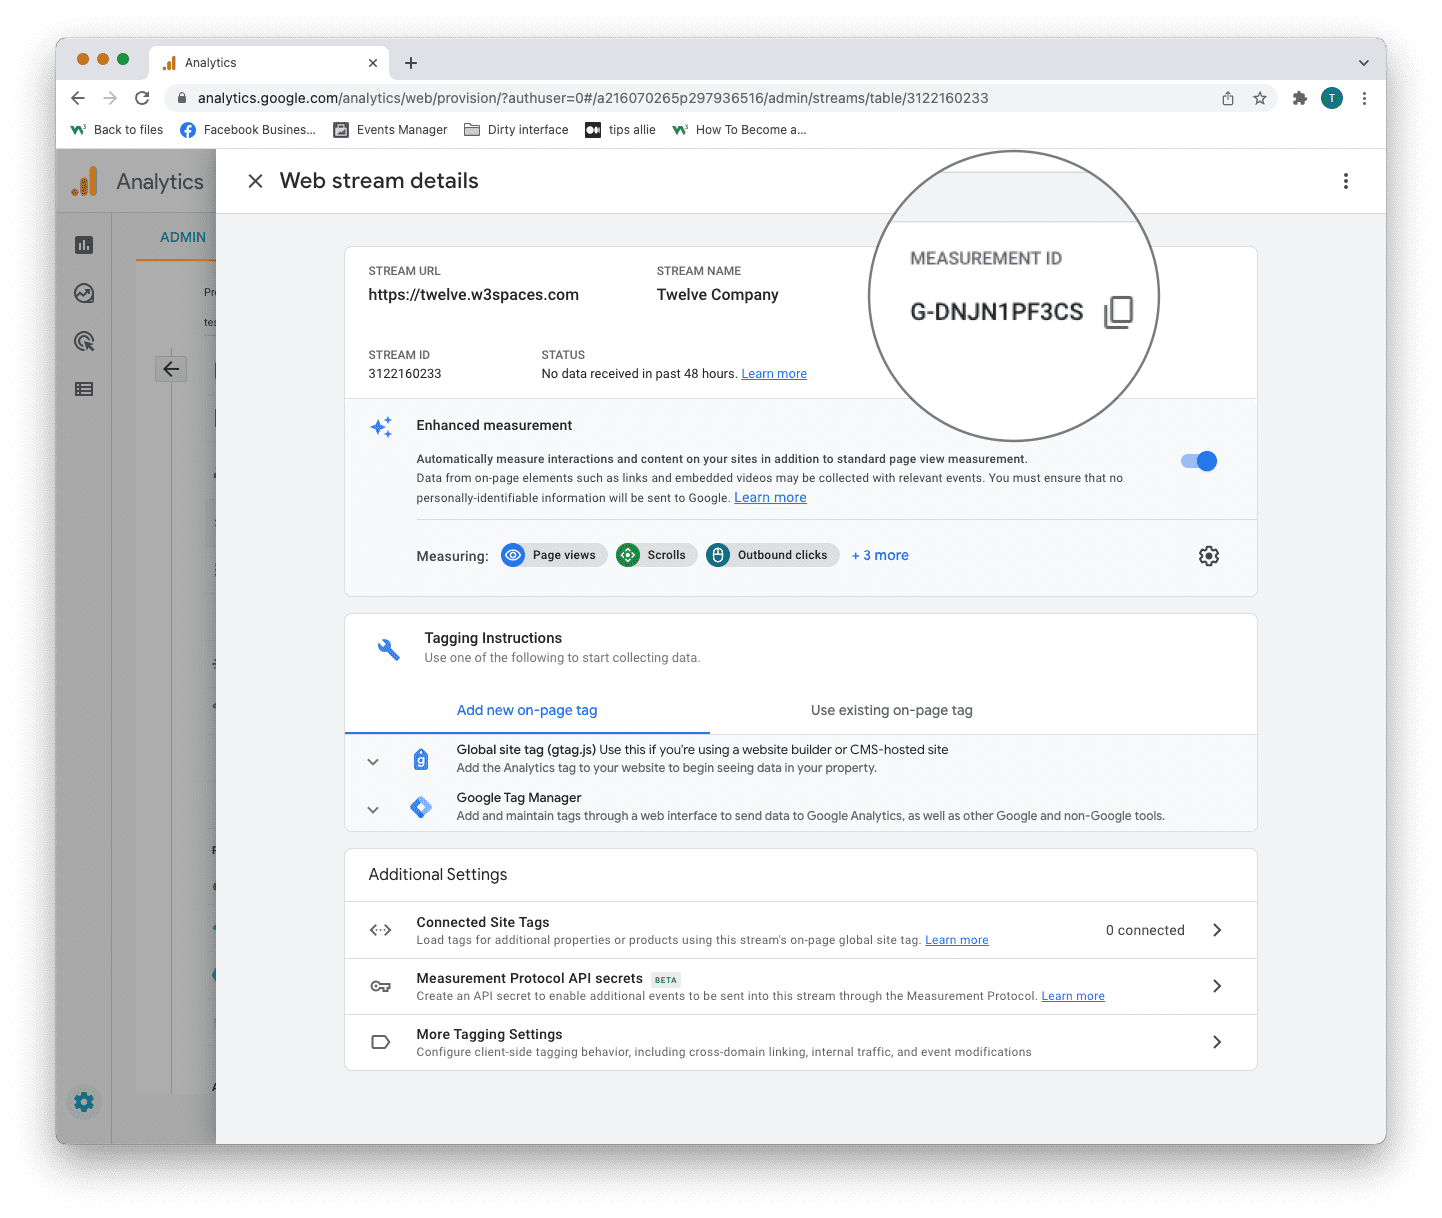
Google Analytics 4 uses Measurement ID. Older versions use Tracking ID. You can not have both.
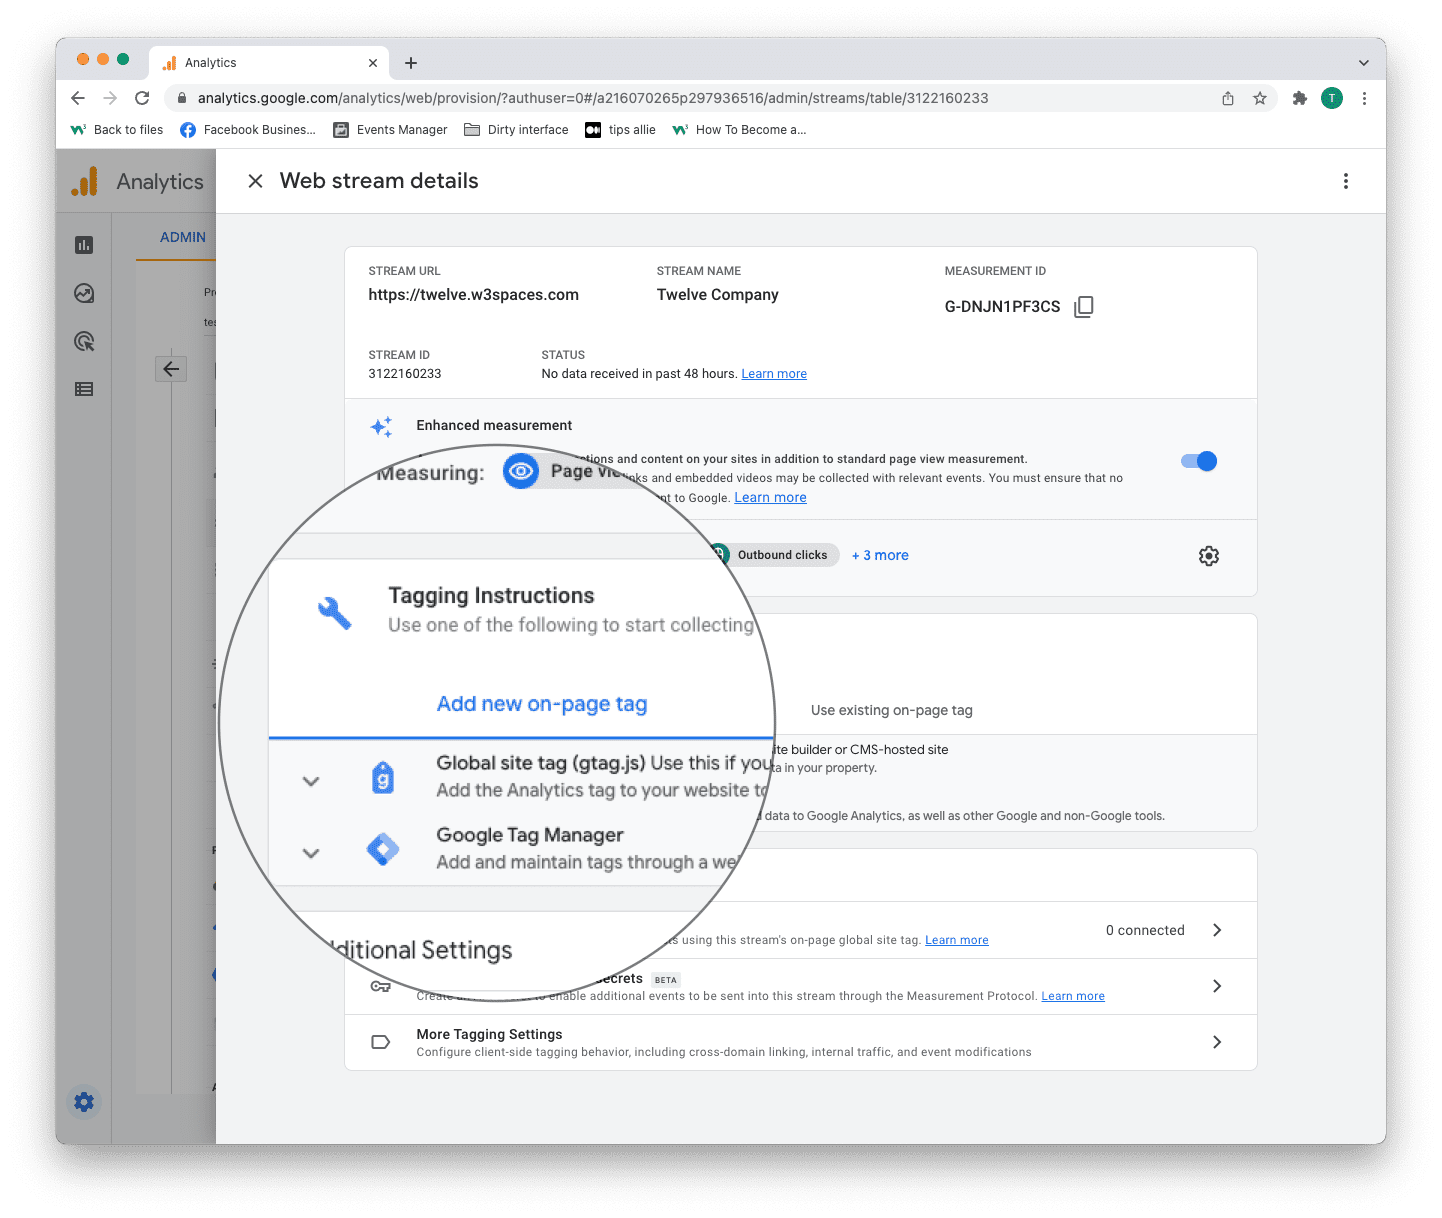
3. Tagging instructions
Decide to use Global site tag (gtag.js) or Tag manager.
This tutorial will use the Global site tag.
Installing the Global site tag is the easiest and quickest way of getting it up and running.
Step 11: Global site tag (gtag.js)
Click the "Global site tag (gtag.js)" row.
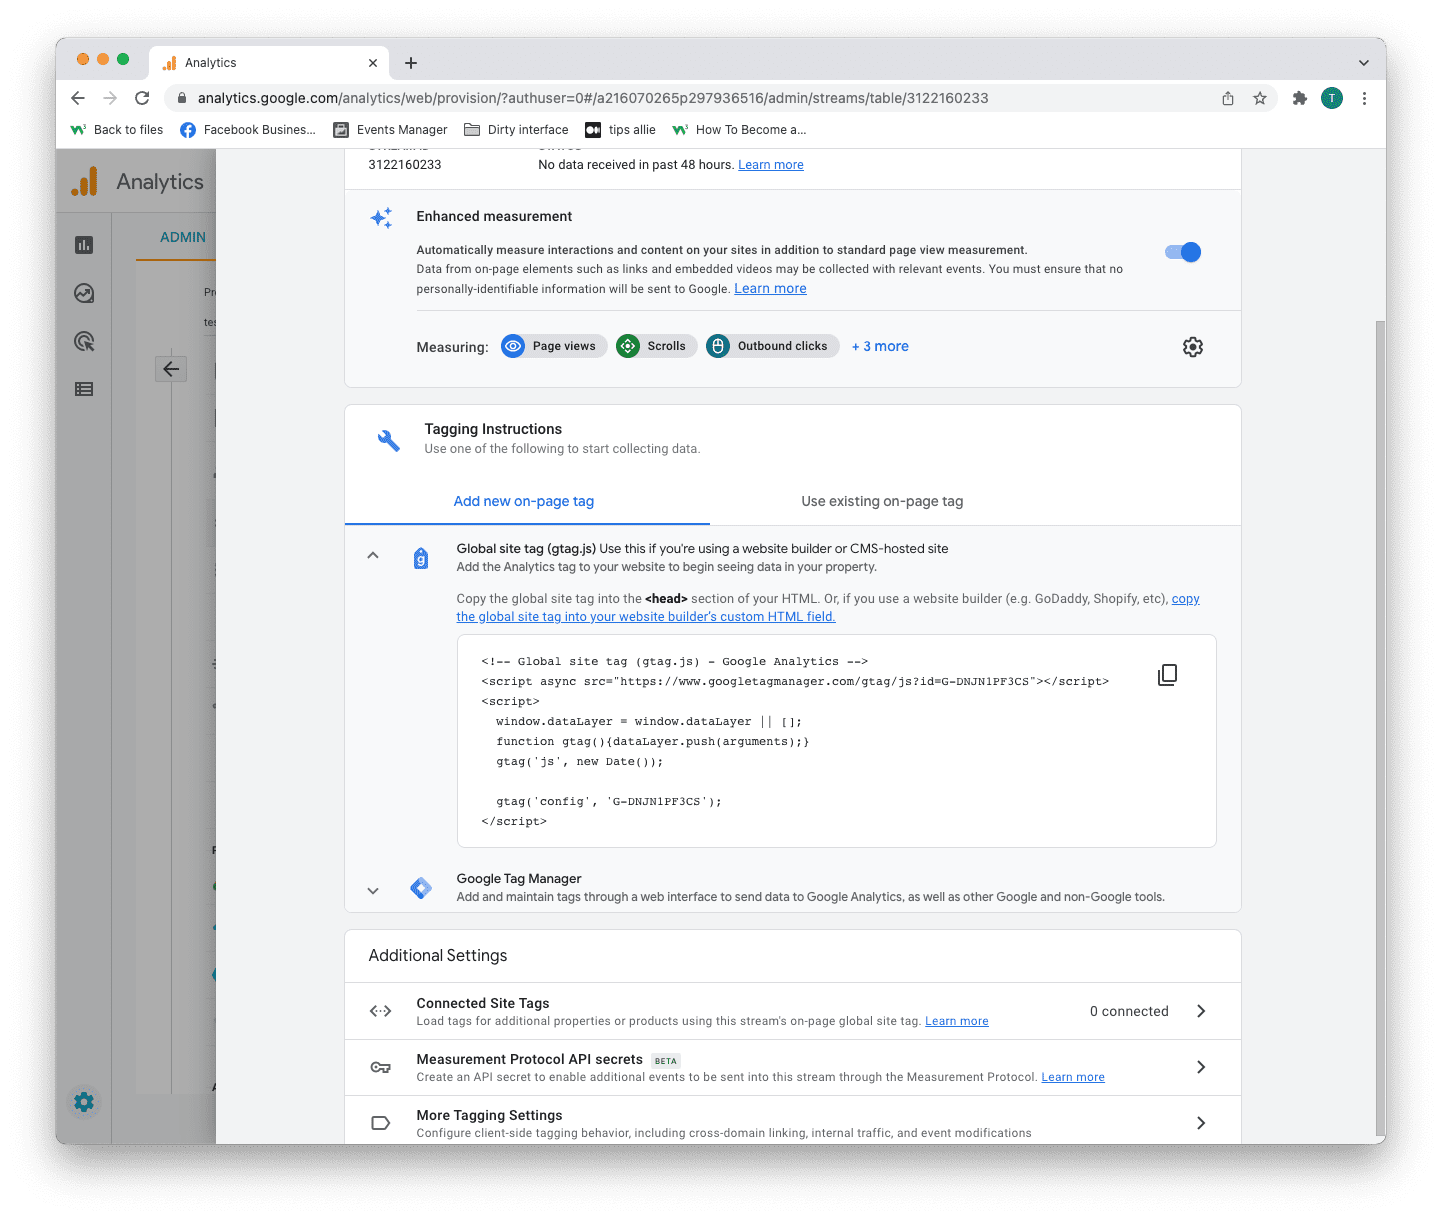
Here you can see a code snippet.
The code snippet is a script to allow Google to measure data on your site.
You can see the Measurement ID in the second last line in the code snippet.
The code snippet
<!-- Global site tag (gtag.js) - Google Analytics -->
<script async src="https://www.googletagmanager.com/gtag/js?id=G-DNJN1PF3CS"></script>
<script>
window.dataLayer = window.dataLayer || [];
function gtag(){dataLayer.push(arguments);}
gtag('js', new Date());
gtag('config', 'G-XXXXXXX');
</script>
Step 12: Enter the code snippet
Copy the code snippet.
Make sure to include your Measurement ID.
Locate the <head> tag in your HTML.
Paste the code snippet just below the <head> tag.
Save and publish the code.
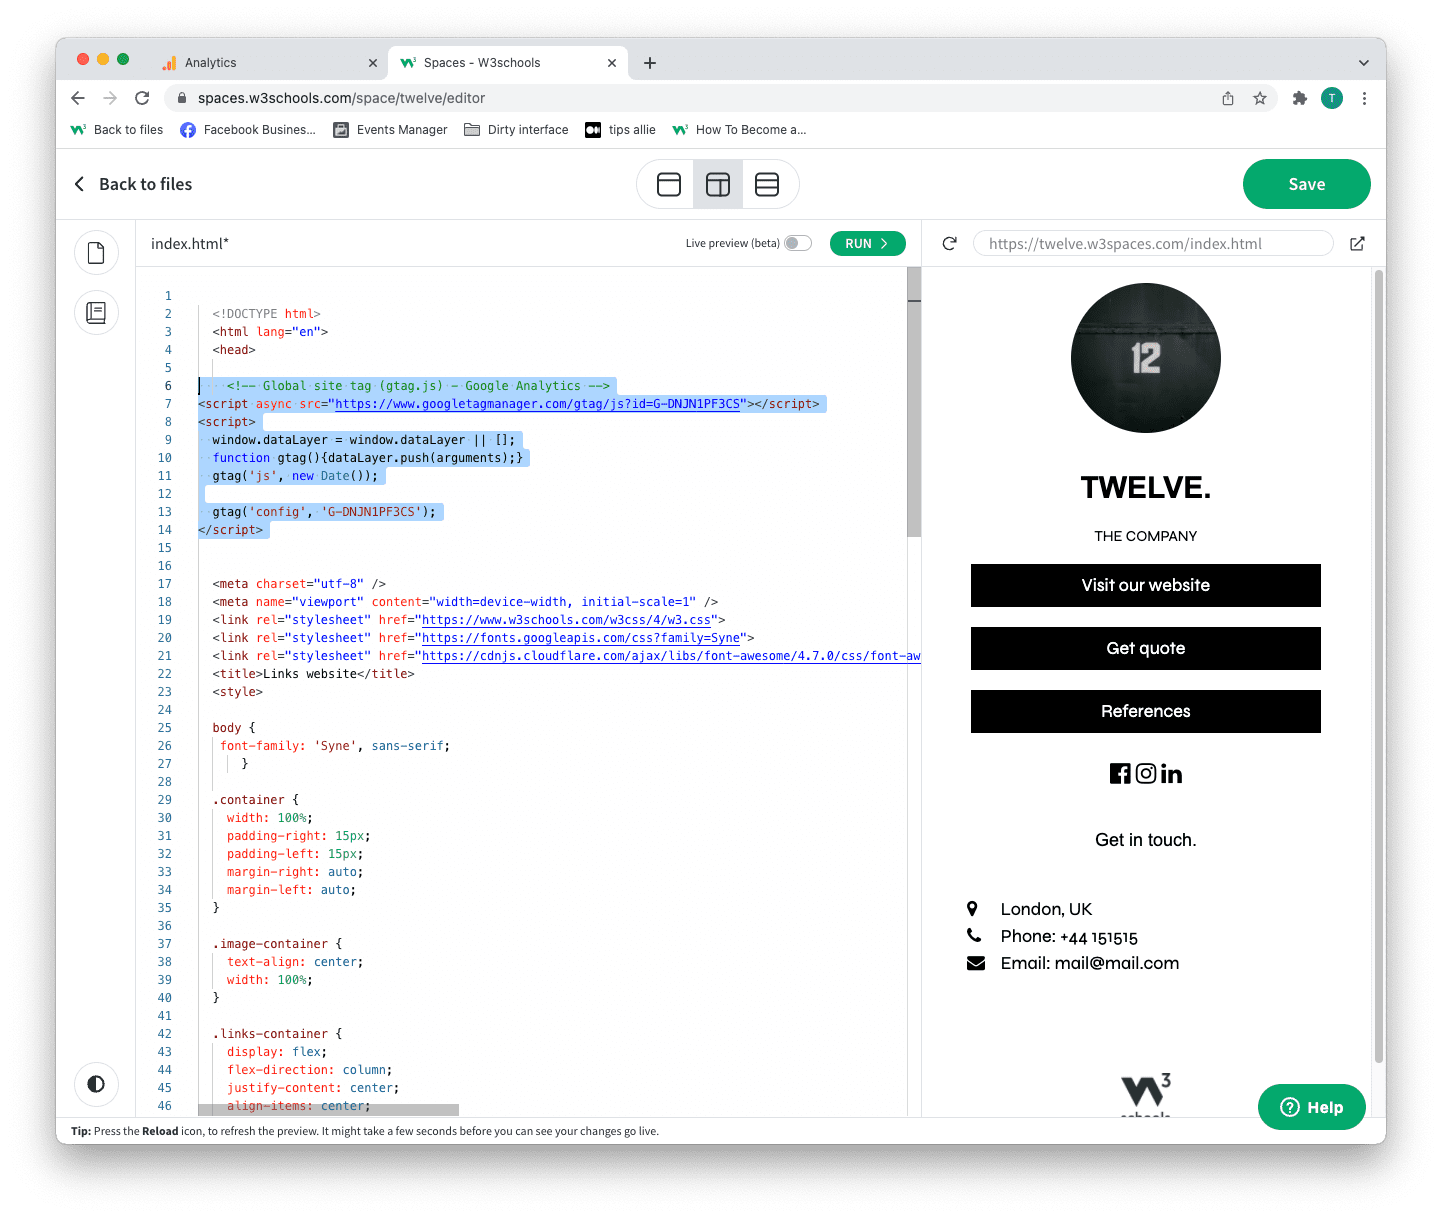
We used W3Schools Spaces in this example.
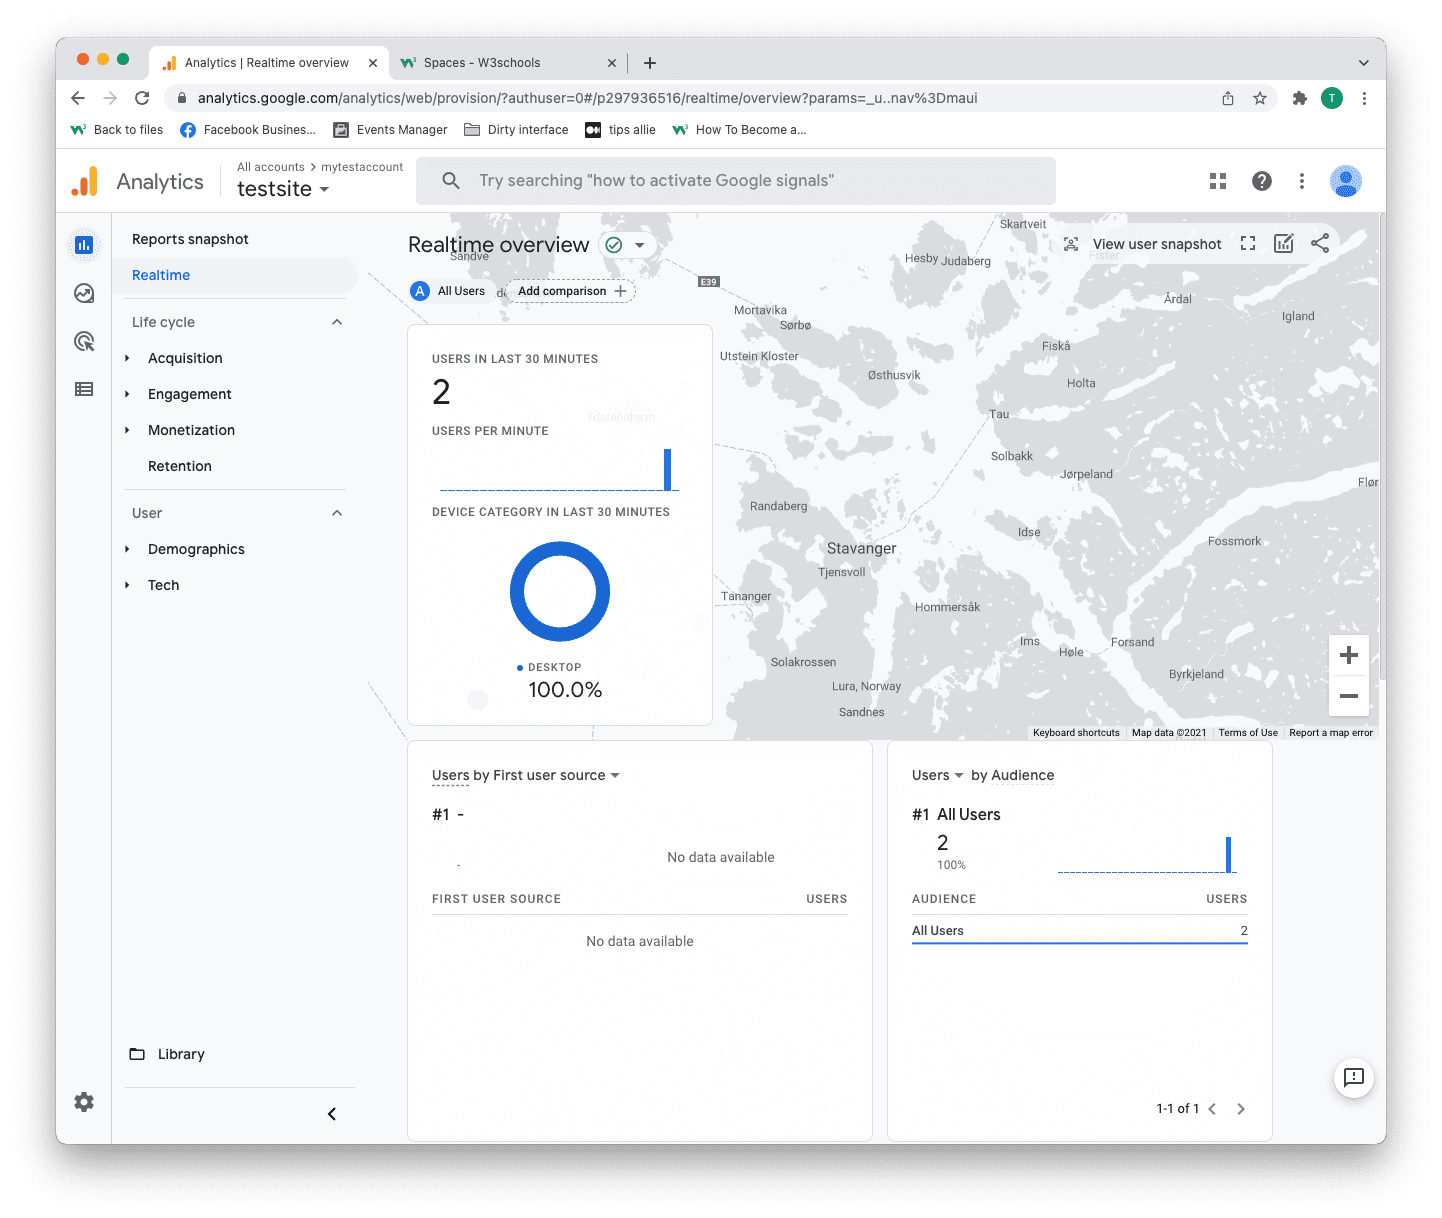
Step 13: Test that it works
Ensure that you have successfully saved and published the code snippet with the correct Measurement ID.
Open the URL for the site you have connected to the data stream.
Click on "Real time" on the menu to the left.
Confirm that you see yourself as an active user.
Congrats. You have successfully enabled Google Analytics for your site!
Explore Google Analytics
Recommended related topics are Tag manager and Events
Spend time in the service to learn about your user activity, commerce, demographics, device, and referrals.
Tip: Ever heard of W3Schools Spaces? It is a personal space where you can make a website from scratch or use a template and host it for free.
It has everything you need in the browser.
Get started in a few clicks.
Start now for free ❯* no credit card required